Version control
Set up Git repository
Before you start on a project you’ll need to set up a GitLab repository. Be sure to create the project under the relevant group. If you’re unsure which group to use, ask your development manager.
Some of the steps below touch on the Deploy process. If you’re not familiar with this, you can read more about it here.
-
Branches settings
Be consistent and secure
Your default branch should be called
main, this might already be the case.This can be managed within the repository UI:
Settings → Repository.Your default branch should be protected
If you are setting up a brand new project, only do this step after you initial commit.Open Settings → Repository and find the “Protected Branches” tab.
Choose “Developers + Maintainers” in the “Allowed to merge” tab and “No one” option in the “Allowed to push”:

This means that no one can push directly to it. Instead, all changes must be made via a merge request.
Related resources
-
Merge Request settings
QualityAs mentioned above, all code integrated with
mainis done via a merge request.For this to work well you need update some config.
Within the repository UI go to
Settings → Generaland expand the Merge requests tab.Select two checkboxes:
- Pipelines must succeed
- All discussions must be resolved

-
Set up CI/CD pipeline
DeployIt’s assumed your build process outputs to a
distdirectory. If not you will need to update the CI script.- Create a
.gitlab-ci.ymlfile in the root of your repository. - Copy the contents of the
.gitlab-ci.ymlfile, click the button below. - Paste it into your new
.gitlab-ci.ymlfile. - Commit and push this using the branching strategy.
 GitLab CI Script
:.gitlab-ci.ymlimage: node:18.15.0 // Change to suit your node version build: stage: build script: - npm install - npm run build artifacts: paths: - dist/ deploy: stage: deploy before_script: - git remote set-url --push origin https://gitlab-ci-token:${CI_DEPLOY_TOKEN}@${CI_SERVER_HOST}/${CI_PROJECT_PATH} - git config --global user.name "$GITLAB_USER_NAME" - git config --global user.email "$GITLAB_USER_EMAIL" only: variables: - $DEPLOY - $BRANCH_NAME script: - DEPLOY_BRANCH="deploy/${BRANCH_NAME}" - TAG_NAME="$BRANCH_NAME-$(date +'%Y%m%d-%H%M%S')" - git branch -D $DEPLOY_BRANCH || true - git checkout --orphan $DEPLOY_BRANCH - git rm -rf . - mkdir -p dist - git add -f dist/ - git commit -m "Update artifacts for $DEPLOY_BRANCH" - git push --force origin "$DEPLOY_BRANCH" - if [ "$DEPLOY_BRANCH" = "deploy/production" ]; then git tag -a $TAG_NAME -m "Tagging production release $TAG_NAME"; git push origin $TAG_NAME; fi artifacts: paths: - dist/* dependencies: - buildRelated resources
- Create a
-
Generate Access Token
DeployIf you look at the CI script closely you might notice a variable called,
CI_DEPLOY_TOKEN. This references a special token that allows the CI script to write to the repository. We need to generate this token with the correct scope.Within the repository UI go to
Settings → Access Tokens.- Name it
CI_DEPLOY_TOKEN. - Check
write_repositoryscope. - Generate access token.
- Copy it, ready for the next step.
Related resources
- Name it
-
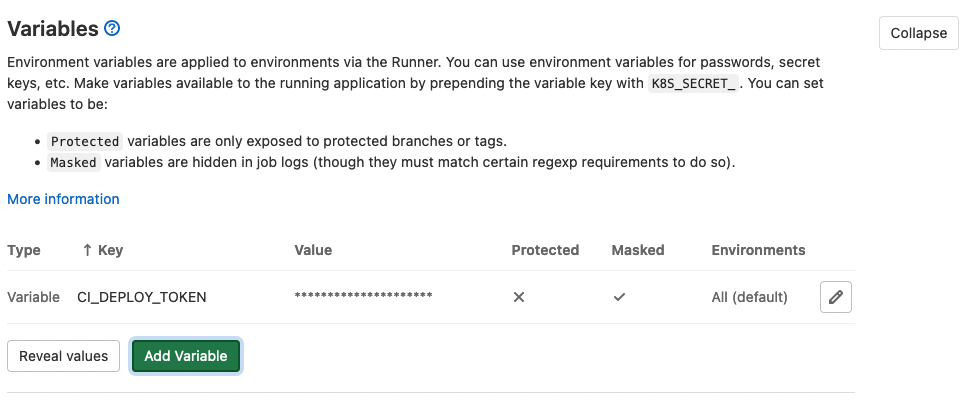
Add CI variable
DeployAdd CI_DEPLOY_TOKEN value from previous step
Lastly, to enable the CI script create our
deploybranches we need to create theCI_DEPLOY_TOKENvariable.Within the repository UI go to
Settings → CI/CDand expand Variables.Add a new variable with the key
CI_DEPLOY_TOKENand the generated token as a value.